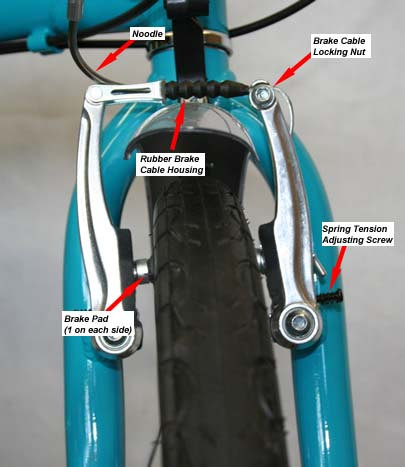
Step #1 The below picture identifies the parts on a V-style brake caliper.

Step #2 Many brake issues are caused by improper housing. Make sure the brake cable housing has a natural bend from the brake lever to the brake noodle. The cable routing should not be too long. Long housing will minimize the braking force ( the entire housing will flex with the cable). Hence long housing will need to be cut and/or replaced. Housing that is too short may be high risk to kink when folding. Once cable housing is kinked it will not work properly and must be replaced. Riders that want an upright seating position that pull the stem to its maximum height must be careful that the brake cables have a natural bend.
Step #3 Make sure the both brake pads are equidistant from the rim. If one is closer than another you have 2 ways to adjust it. Either screw the spring tension adjusting screw inwards on the side that is closer to the rim, or unscrew the spring tension adjusting screw outwards on the side that is furthest from the rim.
Step #4 To minimize squeaking clean the rims and toe in the brake shoes. In other words make sure they point inward at the front.
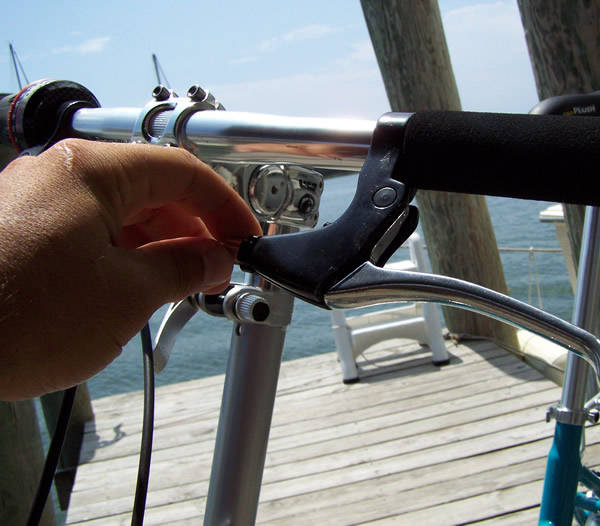
Step #5 If the brake levers feel comfortable you are done. However if the levers engage too fast or too slow the cable tension should be adjusted. If the levers engage too fast one needs to turn the barrel adjuster clockwise into the brake lever ( be sure to back off the locknut first ). If the levers engage to slow turn the barrel adjuster counter clockwise until the engagement feels comfortable. Then screw the locknut to make sure it doesn't move out of adjustment..

