
Flat tire: Should you replace the tube or patch it?
Posted by Dr. Yan Lyansky on Nov 11th 2017
Bicycle Flats
We’ve all been through this scenario: You’ve been looking forward to a ride all day. You get home from work, change your clothes, and head out to the garage. There it is in all its mechanical glory – you bike. You unlock it, wheel it out into the sunshine, and hop on. Uh-oh! You feel the rim pressing against the pavement. You have a flat tire. Now, you have a choice to make. Should you replace the inner tube with the spare you have tucked away, or should you get out that messy repair kit?
In my younger years I got a lot of flat tires, and I always swapped them with a new tube. I always kept the old tubes though, it didn’t feel proper to throw them in the trash, and after all, they were almost good. So, I had a lot of useless tubes filling a box in the basement. I confess, one of the reasons I didn’t want to patch the tube wasn’t just the smell of the glue, or the messy way I applied the patch, it was also that I didn’t trust the patch to take the punishment I gave my tires. Who wants to get five miles from home with a flat and no way to repair it?
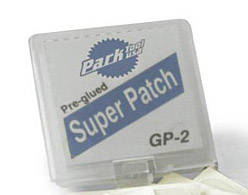
Then I was introduced to Park pre-glued super patches. Wow! What a difference. A package includes six patches and costs only about $3.00. That’s a huge savings over buying a new tube, and it’s better for the environment.
So how does one use them? Just follow the below steps:
1. Find the hole in the tube. If the hole is not immediately visible, which usually is indicated by a slow leak you will need to pump air into it and quickly put the tube under water. You can do this in the sink, a tub, or if you are on the road, in a stream or even a puddle. Air escaping from the tube will cause bubble to come to the surface.
2. Clean the affected area. My preference is to use plain water when I’m home; however, if I'm on the road I’ll use whatever clean-ish liquid I can find. I’ often used my saliva. One good spit is usually enough. Make sure to dry it thoroughly with a rag, or your shorts if you’re on the road.
3. The kit includes everything you will need. Rub the sandpaper across and around the hole to roughen up the surface of the tube. The coarse texture will help the patch stick better.
4. Remove the backing from the patch and apply it over the hole. Make sure it is applied smoothly. Any wrinkles indicate a place where there is a gap and air could leak out. Give it a minute or two to bond to the tube.
5. Reinstall your tube on the bike and continue on your ride.
These patches should last for years. I've used as many as seven different patches on a tube, all in different places.
Overall, patching is cheaper and better for the environment than replacing your tube, so I recommend it for most situations. However, there are some flats that cannot be patched. If the hole is near the valve stem or if it is a linear tear and not a hole, you will need to swap tubes.
Happy riding!